-
How to Fix the Error 6177, 0 in QuickBooks Desktop?
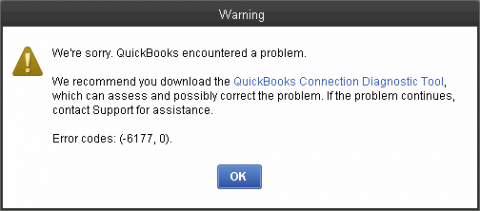
QuickBooks error 6177 0 is one of the most frequent issues users run across. The path of the company file is saved in QuickBooks each time you create a new company file, but the company file itself is kept in the company file folder. QuickBooks Desktop identifies the file in the company file folder when you attempt to access it and opens it for you. “We’re sorry, but QuickBooks can’t open your company file Error Codes: (-6177, 0), so please try again later”. This error message is displayed when the company file is relocated to a different folder or location. Keep reading the whole article to learn more about some additional, less frequent causes and effective quick-fixes for QuickBooks Desktop error 6177 if you are experiencing the same issue and haven’t moved your company file.
Read Also: How to Resolve QuickBooks script error?
A brief review of QuickBooks Company File Error 6177,0
Issues with company files can arise in QuickBooks in a variety of ways. Each company file error denotes a distinct issue with the software and company file configuration. The error message “We’re sorry, QuickBooks encountered a problem” is displayed when error code 6177 0 prevents QuickBooks from accessing or opening your company file. The most typical reasons for why QuickBooks could have trouble opening the company file are covered in the following section of this article. Now let’s move on to the causes right away.
Why is your company file not opening in QuickBooks?
Let’s examine some additional potential causes of error codes 6177 in QuickBooks since we have already discussed the main cause of its occurrence in the article’s beginning.
- One of the most frequent issues that arise when accessing the company file is an outdated version of QuickBooks Desktop. Immediately update QuickBooks Desktop.
- Using QuickBooks File Doctor will swiftly fix any issues that are brought on the company file corruption when you open the file.
- QuickBooks may have trouble connecting to the company file if the network data file is corrupted.
- If sharing data with other network-connected devices is not enabled for the company file folder.
- Your system does not have QuickBooks Database Server Manager installed. (Setup QuickBooks Database Server Manager Now by installing it.)
- Another possible reason for why QuickBooks cannot access the company file is a damaged company file folder.
Methods To Fix QuickBooks Error 6177,0
The steps to fix QuickBooks desktop Error Code -6177, 0 are listed below.
Solution 1: Verify the most recent version of QuickBooks is installed.
- After relocating a file on the local computer, the user must first open the company file in order to do that. Find a portable company file if there is a problem opening the file.
- The following action is to upgrade QuickBooks to the most recent version.
- After that, if your windows firewall settings are not already set up, add it because QuickBooks requires a few ports to be opened.
- If hosting is installed on clients’ computers, the user must thereafter be careful to turn it off.
- A new folder should then be created, and the data file should then be accessed from there.
- In order to access the data, the user must first move the folder to a local computer.
- It is now necessary for the server computer’s folder containing the company file to have full access.
- Finally, all folders on the server—which contains the QuickBooks file—should be accessible.
Solution 2: Launch the QuickBooks Connection Diagnostic Tool after downloading it.
- Install the QuickBooks connection diagnostic tool on your computer first after downloading it.
- Run the QBconnection diagnostic tool after that.
Note: The tool’s usage instructions are located under the Tool tab.
- The QB connection tool will now automatically identify the issue and attempt to fix it on its own.
Note: You should be able to open the file if you see File Open Successful (all Advanced statuses have green checkmarks) because that means your network connection is working properly.
Solution 3: Attempt to manually determine the file path.
If a QuickBooks Connection Diagnostic Tool is unable to run properly on your computer, you must take the procedures listed below:
- Go to the location on the computer where QuickBooks is stored, and then shut it down.
- After that, shut down QuickBooks desktop and remove the network descriptor (.nd) file from the PC that has the company file.
- Open the directory in which the company file is stored.
- Look for the.ND file extension in the file. The file will resemble MyCompanyFile.QBW.ND.
- Choose the Delete option by doing a right-click on the .ND file.
- Set up the QuickBooks database server manager at this time.
- Click the Start button first.
- Go to QuickBooks > QuickBooks database server manager after selecting the Programs option.
- Click the Add Folder button now.
- Go through the QuickBooks company file folder.
- Hit the OK button.
- Press the Scan button. (The list of all the company files hosted by the QuickBooks database server manager can be found in the QuickBooks company files.)
- Once the scanning procedure is finished, simply select Close.
- After that, examine the company file’s Windows access permissions.
- To confirm that permissions are configured correctly, visit the web page Set-up folder permissions to access company files.
- If the server has the complete application installed.
- Switch on and off hosting
- Using the local path, open the company file.
- Establish a new folder.
We really hope that the solutions provided in this article’s information and techniques to remedy the mistake have assisted you in fixing QuickBooks error -6177, 0. Contact our QuickBooks 24/7 support at any time at +1800-615-2347 if you are still experiencing the same issue or have any more questions.
-
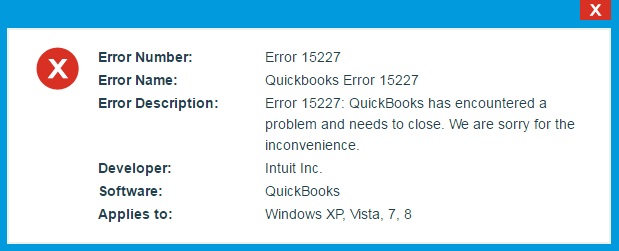
Best Methodology To Troubleshoot QuickBooks Error 15227
QuickBooks error 15227 is a technical snag that occurs when users attempt to install new updates for QuickBooks Desktop. There are various causative factors behind the error. These include damaged installation files, misconfigured SSL settings, and virus intrusion, including Windows registry issues. To get a comprehensive insight into the error, follow up this blog till the very end and resolve QuickBooks Error 15227 once and for all.
Causes behind QuickBooks Error Code 15227
- Previous installation of the QuickBooks Desktop was unsuccessful or incomplete.
- Corrupt Windows registry files.
- Unreliable internet access.
- Incorrect setting of SSL.
- Your O/S does not support QuickBooks.
- Malicious viral or malware infestations.
- The accidental deletion of important QuickBooks files.
- Insufficient privileges or permissions.
Various viable methods to Fix QuickBooks Error 15227
Method 1: Resetting QuickBooks updates
- Open the QuickBooks Desktop and install any updates that are available.
- If the update won’t install, advance to Directory:/Documents and Settings/All Users/Application Data/Intuit/QuickBooks /Components and remove it.
- Soon after, open QuickBooks Desktop, and from the Help menu, choose Update QuickBooks option.
- Try starting QuickBooks Desktop and downloading the updates right away.
- Select Install Now when the Update Service screen displays.
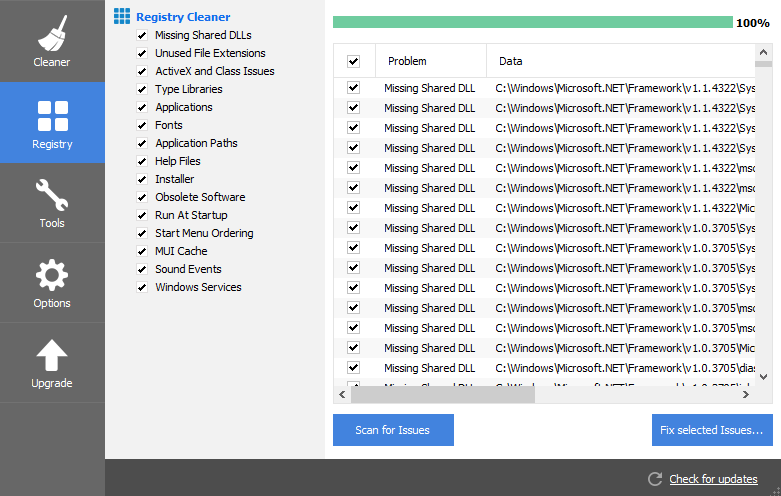
Method 2: Fixing Windows Registry
- After selecting Start, and accessing the search box, type the command ‘’Command Prompt” in the search field.
- Press the Enter key soon after.
- In the Command Prompt box, type Regedit.
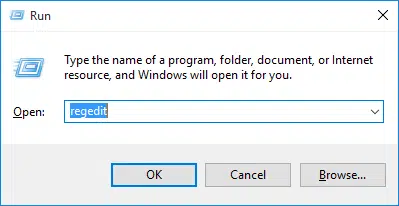
- After that, press the Enter key.
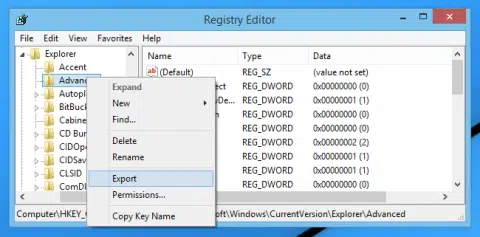
- The Register Editor window appears on the screen. You must now select the key associated with error 15227. The key must be transformed into a backup.
- You should select the Registry Editor.
- Now, select File.
- Click the option marked Export.
- Next, save your selection to Enlist.
- Select the folder for which you want to create a backup.
- Assign a name to the backup file.
- Click Save and make sure the file is saved with the “.reg” extension before selecting the Export Range option to save the key.
- Once these procedures are finished, the Windows Registry backup will have been created.
Method 3: Clean Install QuickBooks
- Disable all Microsoft services.
- Press the Windows and R keys and type the command Msconfig in the Run box to open the Configuration window.
- In the General tab, you must now select the Selective startup option.
- Click Restart after making sure Windows Installer is selected.
- To finish these steps, use the QuickBooks Desktop clean install.
- When the removal of QuickBooks is finished, choose Normal startup from the System Configuration menu before choosing Restart.
Method 4: Updating Windows
- Launch the Windows Settings.
- Later on, select Update & Security.
- Choose Check for Updates from the menu.
- Your computer will start looking for fresh operating system updates as soon as you do this. If there are any updates available, you can decide whether to Download and Install the Updates.
- Once the updates have been successfully installed on your PC, you should restart the system. After that, you can update QuickBooks and check to see if error 15227 is still present.
Method 5: Run SFC Tool
- Press the Windows key.
- Start your search by typing Command Prompt.
- Right-click Command Prompt and opt for running the program as an Administrator.
- In this box, type the command Sfc /scannow and then press the Enter key.
- Watch for the process’ conclusion.
- When it’s finished, restart your computer. You can use this to scan your system files. You could attempt updating QuickBooks to see if the issue persists.
Fixing QuickBooks Error code 15227 is easy if users conform to the walkthrough discussed in this blog. For related queries, users can call our QuickBooks experts at +1800-615-2347.
Read More Artticles:
-
Resolve QuickBooks Error 15222 (All Causes and Solutions)
Payroll is an important part of QuickBooks accounting software, and no matter what size or type of business it is, it makes sure that payroll processing goes smoothly and without interruptions. Payroll is also more likely to have issues than other parts of QuickBooks, and even a small mistake can cause errors in different payroll processes. QuickBooks Error 15222 is a rare but hard to fix error that happens when upgrading Maintenance Release, Critical Fixes, Essentials, and Payroll tax tables in the Update QuickBooks Desktop window. If you also get QuickBooks error code 15222, follow the steps in this article to resolve the issue right away.
A brief review of the QuickBooks Error 15222
Errors in the 15XXX series are frequent when upgrading QuickBooks and its components. When QuickBooks is unable to connect to the internet in order to install the update files, it generates QuickBooks Update Error 15222. This can happen for a number of different reasons. According to the error code you’ve received, you can also receive different error messages. An active version of QuickBooks Desktop is necessary to update QuickBooks online services like payroll. So check to see if you’re not using an outdated version of QuickBooks.
Causes of QuickBooks Error 15222
The main cause of Maintenance Release Update Error 15222 is the absence of digital signature certificates from the web browser. The following are some causes of QuickBooks Desktop error 15222:
- Earlier versions of the QuickBooks Desktop software
- Occasionally, system security tools like antivirus, firewalls, anti-malware, and anti-spyware prevent QuickBooks from connecting to the internet, resulting in error 15222.
- You are using a different web browser, such as Firefox or Safari, as your primary internet browser instead of Internet Explorer.
- On Windows, the user is not signed in using an administrator account.
- Your Windows computer’s incorrect time and date can also cause QuickBooks to display payroll update error 15222.
Methods To Resolve QuickBooks Error 15222
Method 1: Install Digital Signature in Internet Explorer
Digital signatures are used to confirm an application’s authenticity. It won’t be able to download updates from the Intuit update server if QuickBooks Desktop’s digital signature is missing.
- In the address bar of Windows File Manager, type C:Program FilesIntuitQuickBooks.
- Once you’ve found the QBW32.exe file in the QuickBooks folder, press Enter.
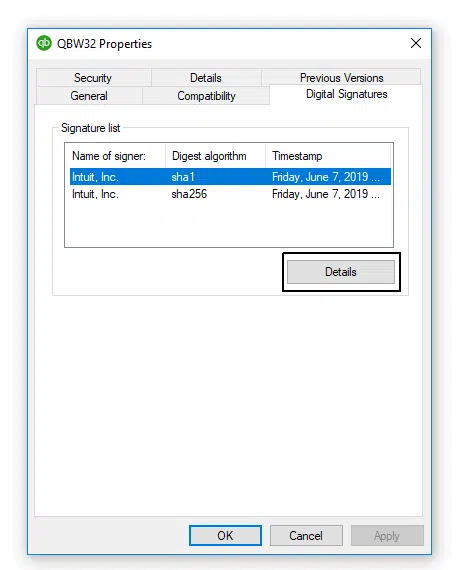
- You can choose Properties by right-clicking the QBW32.exe file.
- Find the list of signatures by selecting the Digital Signature tab.
- On the digital signature from Intuit Inc., click Details.
- Click the View Certificate button in the Digital Signature Details window to continue.
- Go back to the Certificate window and select Install Certificate.
- Once you see the Finish option, click the Next button.
- Restart your computer after clicking Finish.
- Update QuickBooks once more if necessary.
Method 2: Set the default Internet browser
QuickBooks Desktop connects to the network by default using Internet Explorer’s internet settings. However, QuickBooks may have trouble obtaining the updates if you have another browser as your default.
- Open Internet Explorer and choose Internet Options in the Tools section to set Internet Explorer as the default browser.
- Under the Programs tab, select the Make Default option.
- After that, click OK to restart the QuickBooks update.
Method 3: Run the QuickBooks File Doctor from the Tool Hub
The ideal tool to handle common network and company file issues is QuickBooks File Doctor.
- Click Here to download QuickBooks Tool Hub.
- Launch the QuickBooksToolHub.exe file by going to the downloads folder.
- To install the application, you must consent to the license’s terms and conditions.
- To continue with the installation, click Next.
- Use the desktop icon that was created once the QuickBooks Desktop Tool Hub has been installed on your computer.
- Then, click Run QuickBooks File Doctor from the Program Problems tab.
- After that, choose “Repair the file for your existing QuickBooks version” and press Next.
- After the file repair is done, check to see if “QuickBooks Major Upgrade Error 15222” is still occurring.
If none of these steps work to fix QuickBooks Error 15222, check to see if you can connect to the internet. If you can’t connect to the internet properly, you should talk to QuickBooks support team for help fixing the problem. If your internet connection is fine but you’re still receiving the payroll update error 15222, call us at +1800-615-2347 for assistance.
Read Also: How to Fix QuickBooks Error Code 1603?
-
How to Delete Multiple Transactions in QuickBooks Desktop?
QuickBooks has established itself as one of the greatest accounting software options available everywhere in the world. This software has been quite beneficial, particularly for small and medium-sized businesses. With the help of QuickBooks accounting software, business transactions such as sales, receipts, payments and payroll been less difficult to handle. Because it possesses so many cutting-edge capabilities, this program is among the very finest accounting software program. In point of fact, new features are included in each new edition of the software.
Users are able to enter batches of deposits, checks, credit card charges or invoices, credit memos, bills, and bill credits in all of the most recent editions of QuickBooks Desktop. In this post, we will go be provide a detailed overview of how to enter and delete transactions by batch in QuickBooks. Thus, keep reading.
Steps for entering batch transactions in QuickBooks
To enter the transactions by batch in QuickBooks desktop follow the steps given below:
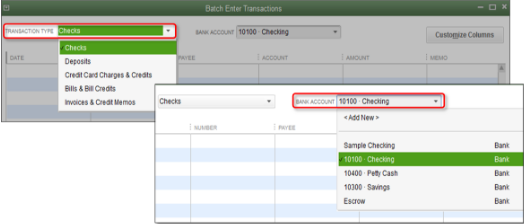
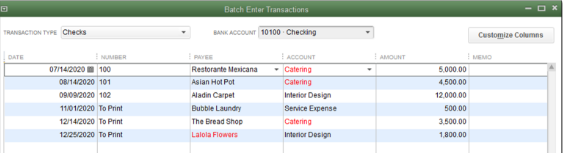
- Proceed to the Accountant menu system and select Batch Enter Transaction from there.
- Make your selection for the Transaction Type there from the available options, and then head over to Account.
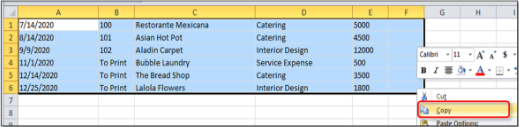
- Launch the Excel spreadsheet that contains the records of your transactions in the QuickBooks Desktop application. It is necessary for you to make adjustments to your spreadsheet in order to ensure that the values in the Batch Enter Transactions section are accurate.
- You can call attention to your data by choosing it and then right-clicking on it.
- Simply select the Copy option from the drop-down menu on the dialogue box.
- When you are in the window for Batch Enter Transactions, navigate to the first date field and right-click on it.
- Now, to paste your data onto the Batch Transaction Window, select the Paste option from the menu.
All of the particulars that are missing from the QuickBooks company file will be highlighted in red when viewed in the program. Select all of the information that is highlighted in red, and then go to the option to Quickly Add or Set Up.
You currently have two choices,
- For the purpose of adding several split lines to the transaction.
- In order to make use of the Class within QuickBooks Desktop.
Choose the option to Save the transaction, and then hit yes on the Verify your Account screen.
Steps to batch remove a transactions in QuickBooks
Following are the steps to batch remove the transactions in QuickBooks desktop:
- While you are focusing your attention on the ongoing transaction, press the Control key and the letter D simultaneously on your keyboard.
- Note that if you need to delete the option for the warning message, you also have the choice to deselect the box labeled Warning given while removing a transaction or deleting any unused list item. This gives you the ability to remove the option.
- On your keyboard, you will need to press the Ctrl key in combination with the D key.
- After that, from the menu bar, select Edit, and when the Edit menu appears, select Preferences.
- Navigate to the General menu, and then click on My Preferences in that menu.
You will have an easier time to enter and delete transactions by batch in QuickBooks if you follow the instructions provided in this article. In the event that you have any questions or concerns, you can get in touch with our QuickBooks desktop technical support team by calling the number i.e., 1-800-615-2347.
We offer support 24 hours a day, seven days a week for a variety quarries regarding QuickBooks. We have employed specialists that are extremely experienced and skilled, and they will assist you with all of your QuickBooks problems.
-
QuickBooks Error Code C=272 – How to Fix It
It is unsettling to discover errors while you are in the middle of performing a crucial task and have to pause what you were doing as a result of the error. QuickBooks error code C-272 can appear if you are using the QuickBooks Verify Data Utility or the QuickBooks Rebuild information application on your own computer.
The responses also rely on the explanation for the QuickBooks problem; as a result, we are going to understand what led to the error C-272 in this article, and then proceed immediately to the solutions in order to correct the QuickBooks error C-272.
What causes the QuickBooks error C-272
The reasons that cause to the QuickBooks error code C-272 are listed below:
- When scrolling through a report’s data,
- In the event that the target Bit Set is found to be outside of the expected range of QuickBooks, the utility must be verified or rebuilt.
- When you are printing the W2 forms or the q099 forms,
- Ruined information within your QuickBooks software.
- Execution of the report that was previously created in an older version of QuickBooks and stored in memory.
Steps to Fix the QuickBooks Error C-272
The problem with the QuickBooks error code C-272 has to be fixed in a method that is both scientific and practical. The steps that should be taken to resolve the issue are outlined in the following:
Step 1: Open QuickBooks Sample Company Report
- Launch QuickBooks while simultaneously pressing and holding the CTRL choices.
- When you reach the window labelled “No Company Open,” delete the text from the box.
- In the event that the error occurs prior to the popup stating “No Company Open,” which appears on the screen, go to the next step.
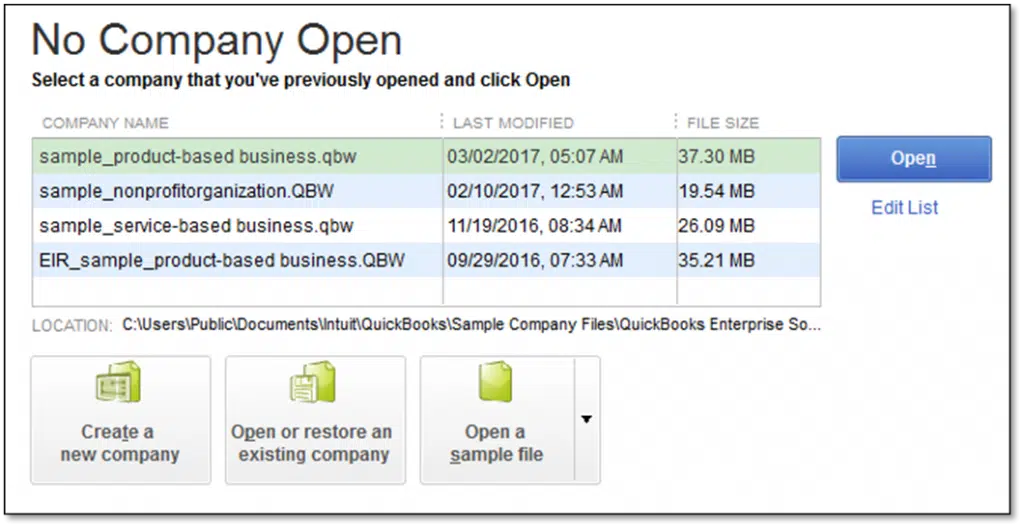
- To open a pattern report, you must first select the “Open pattern report” option and then choose one from the available options on the checklist.
- Next, select the “Open pattern report” option from the drop-down menu, and then select “pattern report” from the list of available options.
- Launch the pattern report at this point.
Step 2: Disable Windows Compatibility Mode
“Windows 10 compatibility mode” can be accessed through the QuickBooks Desktop shortcut icon.
- Select “Shortcut” from the context menu before clicking on the symbol for QuickBooks.
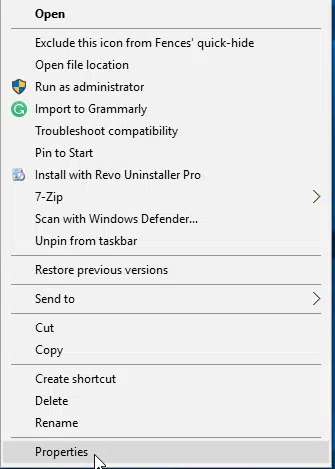
- After that, choose “Properties”.
- To view compatible devices, select the “Compatibility” tab.
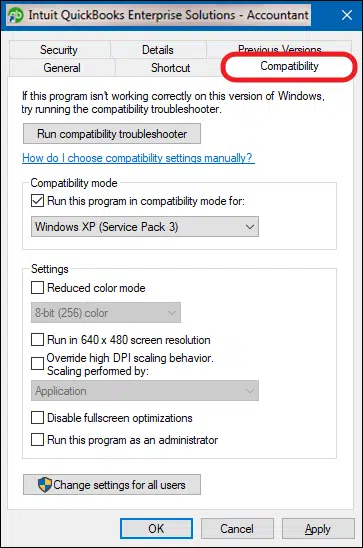
- Be sure to deactivate the checkbox that reads “Run software in compatibility” before continuing.
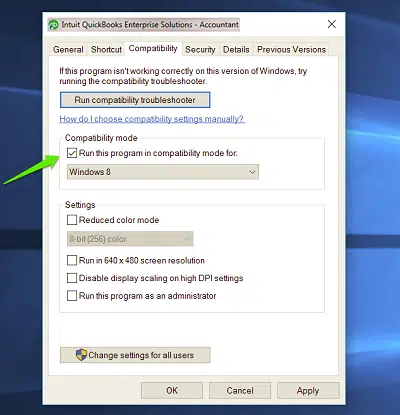
- Click the OK button.
- You can skip this step by pressing the “Cancel” button, which will take you to the next step.
Step 3: Disable “Windows Compatibility” for the “qbw32.exe” report
It is recommended that you turn off Windows compatibility mode for the qbw32.exe file.
- Click the right mouse button on the QuickBooks icon loca.
- ted on your Windows desktop.
- Select “Properties” from the menu.Launch the “QuickBooks Installation folder” from the menu that appears.
- Press ‘Find ‘.
- Next, select qbw32.exe with the right mouse button, and then choose “Properties” on the menu that appears.
- To ensure that your device is compatible, click the “Compatibility” button.
- Delete the checkmark from the box that says “Run Program in Compatibility.”
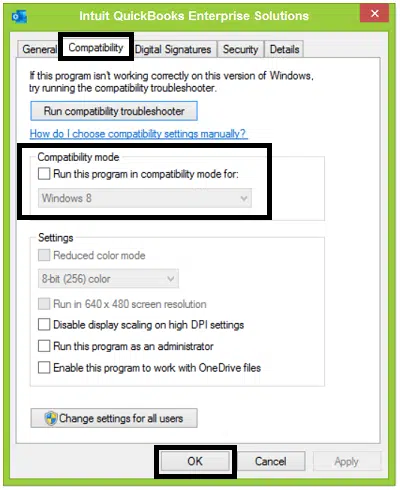
- Simply tap the OK button.
- Now, you can get rid of this possibility by clicking the “Cancel” button. in the event that the box is not selected with the checkmark
- Turn off the ‘Windows Explorer’ as well as the “QuickBooks Desktop shortcut Properties”.
Step 4: Open QuickBooks together with the Company Report
The error has been fixed, and you can now try opening the Company report to see if the QuickBooks Error code c=272 is resolved.
You are provided with the knowledge necessary to correct the QuickBooks Error C-272 in the QuickBooks Desktop software that you are using. You can determine the cause of this error code by looking over the complete list of possible explanations, which is provided for you. You will also find a comprehensive explanation of the solution, which consists of some simple steps, so that you can solve the problem on your own.
Contact the QuickBooks customer support team on our helpline number +1800-615-2347. if you have any queries or if there is anything more you want to learn about the software. The members of the help desk staff are accessible 24 hours a day, 365 days a year to provide assistance to you in any situation that may arise.
-
Hello World!
Welcome to WordPress! This is your first post. Edit or delete it to take the first step in your blogging journey.
-
Subscribe
Subscribed
Already have a WordPress.com account? Log in now.
